


We eat first with our eyes. This has been true since the first-century Roman foodie Apicius first uttered the phrase, and it’s even truer in the age of digital dining. Mastering restaurant food photography has never been more important, but it’s also never been easier (or less expensive). In this article, I’ll share restaurant food photography tips to optimize your in-person and online menus, drive sales, and present your restaurant food in the best light.
1. Find the Best Light
Before you begin taking a lot of food photos, spend some time studying your restaurant layout to identify the places (and the times of day) that get the best light. Food and beverages invariably look most appetizing in even, natural light. North-facing or south-facing windows tend to be best for this, as they rarely get direct sunlight. Identify a few promising windows, then check the light levels at different times of the day. Checking consistently lets you pin down when and where to photograph your food and drinks.
Once you find an ideal window, you’ll want to put your food in front of it. You can create more complex lighting schemes (see tips 4 and 11 on this list), but good, even, diffuse natural light is enough to make most restaurant food look great for social media posts.
Notice the diffuser screen between the window and the food in this image; a diffuser can soften harsh light and make your food look more inviting. (Source: Neewer on Amazon)
2. Find Your Food’s Best Angle
Food photography flattens a three-dimensional dish into a flat, two-dimensional image. Making your dishes translate into craveable images might require some changes to your plating or capturing images from creative angles. Taking a food photo from above is a popular angle. This makes sense since it mimics the way the food looks from a diner’s perspective.
A downward angle in a food photograph shows a diner’s-eye-view of your food. (Source: Unsplash)
Burgers, sandwiches, and other “tall” foods are generally better photographed from a side angle. A side angle lets customers see the layers and all the ingredients in a stacked dish. Studies have shown that consumers enjoy layered foods about 13% more than non-layered foods. So showing off your layers adds major craveability points.
A side angle is ideal for stacked foods like burgers and sandwiches.
(Source: Simplot Foods)
3. Learn Some Food Styling Hacks
While we’re on the subject of burgers, they are one of the most food-styled foods in all of food photography. Burgers are a great place to practice some of your own food styling skills. You don’t need to get a full palette of food coloring and pipettes, but a few basic food styling hacks can boost your food images.
Here are a handful of sure-fire winners:
- Wipe your plates: Wiping plates is standard practice in many restaurants, and for taking food photos, wiping plates is essential. You want to remove any crumbs, fingerprints, or stray bits of sauce that could muddy your image.
- Add oil for shine: Add oil with an eye dropper or paint brush in key areas of your dish (like the meat on a burger or the tomatoes on a salad). This adds shine to the plate and makes images more craveable.
- Create peaks: Use a wide knife or spatula to create peaks in soft foods like hummus, yogurt, or mashed potatoes. These peaks create visually interesting textures with highlights and shadows.
- Break out the tweezers: You don’t want fingerprints mucking up your beautifully arranged plate; use a tweezer, chopsticks, or other fine implements to add garnishes and final layers to your dish.
- Use artificial ice: Acrylic or silicone ice cubes won’t water down a drink or add condensation to the outside of a glass.
- Stock up on sponges: Hidden sponges are an excellent way to increase a dish’s volume. A bit of sponge can keep a burger patty from weighing down garnishes or boost lettuce leaves over the edge of a salad bowl. A sponge soaked in boiling water placed behind a bowl of soup or a mug of coffee adds steam to your image.
The idea is not to misrepresent your food; your food photographs should look like the food you serve. But using food styling hacks can help your food hold up longer so you have more time to capture the perfect image.
4. Get Some Basic Tools
If you take food photographs regularly for your restaurant, buying some basic photography tools will save you time and improve your images. If your budget is tight, you can get most of these items for under $100.
- Tripod: A tripod holds a smartphone or camera at a steady angle, freeing you up to style your scene. Tripods also reduce shaking when you press camera buttons, leading to sharper images. Expect to spend at least $70 for a good tripod. Check out our pick.
- Stepladder: A step ladder helps you capture the ever-popular “looking down at your food” shot. It allows you to view a whole tabletop full of food and props, increasing the stories you can tell with your food photography. If you don’t already have a stepladder in your kitchen, you can get a solid step ladder for about $40. Here’s one we recommend.
- 5-in-1 reflector kit: Reflectors are fabric panels that reflect light into your photo frame. They are an excellent and inexpensive way to control the shadows and highlights in your food photos and make the most out of natural light sources. A 5-in-1 reflector kit costs around $65 and includes white, silver, gold, and black reflectors and a diffusion panel. See our recommended kit.
- Portable lights: Portable lights can create a light source when you don’t have access to natural light. Or you can use portable lights to create a fully controlled artificial light environment. Portable lights can be as simple as a $20 work light or you can get studio-quality stand lights for around $250. Stay within your budget and your skill level here. If you are a beginning food photographer, spending thousands of dollars on lights won’t improve your images as much as practice will. Here are our work light and stand light picks.
A simple stepladder can quickly expand the angles you use in your food photography. (Source: Pinch of Yum)
In a pinch, I’ve used parchment paper to diffuse hard natural light. Restaurants usually always have this on hand. Just be careful using parchment paper around hot lights; it can catch fire. But it makes an excellent diffuser on a window.
5. Add Dish Details
A complete dish is more than just the main ingredient. Adding side items, plate garnishes, or even filling the background with other ingredients can make your food photography more exciting for customers.
The addition of garnishes and side items makes this rack of ribs look more abundant. (Source: Unsplash)
6. Tell a Story
Restaurant food is as much about the experience of eating as what is on the plate. Try to capture your restaurant’s atmosphere and ambiance in your food photography. Show customers how your dishes can help them celebrate a birthday, anniversary, special occasion, or simply a Friday night.
This image of hands passing a plate over a table loaded with menus and other foods tells customers what brunch is like at your restaurant. (Source: Unsplash)
You can tell a story in your food photographs by enhancing the background behind your featured dish. A good example would be an image of a happy hour cocktail that shows the outlines of laughing patrons in the background. A cake photographed surrounded by white table linens and flowers practically screams “wedding.”
7. Enhance Your Images
Even with the best lighting, angle, and camera, your images may need a little editing to really pop. This could include removing the background completely to show your food on a completely white background on an online ordering site, or it could involve correcting colors or other parts of the image that don’t look quite right.
Note the stark difference between the raw image and the edited one. (Source: Fiverr)
Many photo editing apps include built-in filters for quick food photo editing. If you process a lot of food images it might be worth investing in photo editing software like Photoshop or Lightroom. Or, you could send your images to a freelance photo editor through a freelancing site. A professional photo editor will get through the editing process a lot faster than you can learn photo editing software. If you have a lot of images to get through, hire a pro.
8. Add a Vivid Background
The background of our food images can help your menu items pop, especially online. Isolating your dish image and placing it over a bright background gives it personality and energy. Isolating your dishes this way makes your food the star.
Square’s Photo Studio app uses artificial intelligence to identify your dish so you can easily change the background surface or color. (Source: Square)
You don’t have to have expensive software or advanced photo editing skills to modernize your backgrounds. Square’s free Photo Studio app uses artificial intelligence to identify your main subject and provides several options for customizing your background. If you have a connected Square account, you can upload images to your online ordering site directly from your smartphone or add purchase links to social media posts.
Square offers a lot of free tools (including a fully free point-of-sale system) that are great for new and growing restaurants. Check out more of Square’s free tools by visiting Square.
9. Optimize Image Size
Digital images have a few numbers associated with them—dimensions (also called image size) and resolution. The image size and resolution you need depend on how you use each photo. Large image dimensions and higher image resolutions create larger files, which can slow down page loading on the internet. Images that are too small or low in resolution will look blurry and unprofessional in print. So it’s important to get the image size right for each application.
Image size tends to be measured in pixels, usually abbreviated as “px.” The more pixels the larger the image will be. Resolution is measured in dots per inch, or “dpi.” Resolution is most important in printed applications. Though a high dpi can also increase the file size of digital images. The table below lists some common restaurant food photo uses with their ideal image size and resolution.
Best Food Image Dimensions and Resolution
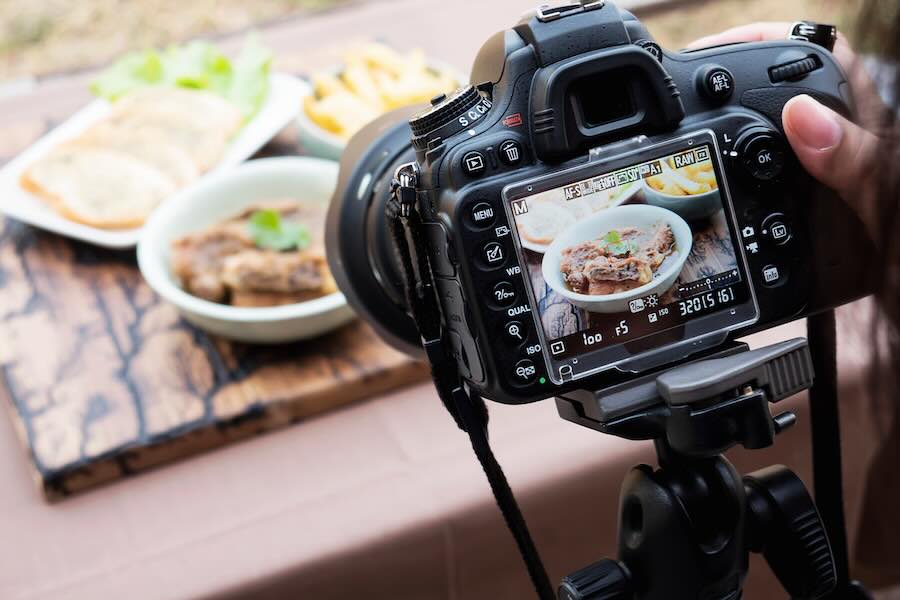
10. Use the Best Camera for Your Purpose
It is often said that the best camera is the one in your hand. For social media posts and point of sale thumbnail images that’s definitely true; your smartphone camera is powerful enough. For your restaurant POS images, it’s most important that the order buttons look exactly like the dishes that come out of your kitchen. For posting on social media, it’s most important to post often.
Smartphone cameras are increasingly powerful, so with some knowledge of lighting and the best angles, you may get images strong enough for an online or printed menu. Though if you plan to print your images on table tents, postcards, large format menus, or menu boards, then you should use a DSLR camera. But in those cases, or especially if you are printing a cookbook, the best camera might be the camera in the hand of a professional photographer.
11. Know When to Hire Professionals
If you need images for printed use like for direct mail campaigns, image-based menus, or a cookbook, a professional photographer will give you better images than you could capture. A pro will also save you a lot of time setting up shots, second-guessing lighting choices, and editing images.
Professional photographers are also great for providing a cohesive, upgraded look for your online ordering sites. You don’t need to break the bank to hire a food photographer. Freelancer sites like Fiverr list food photographers for rates as low as $50. Though keep in mind that by spending more you’ll get a more experienced photographer who typically provides additional services like photo editing and optimizing images for different uses.
Some online ordering sites like DoorDash will pay for a professional photographer to photograph your menu; all you need to cover is the cost of preparing the food for the photoshoot. You can use these images on your website and marketing materials; DoorDash asks that you don’t use the images on competing third-party ordering websites.
DoorDash will pay for a professional photographer to capture images of your menu items. (Source: DoorDash)
12. Keep Practicing & Learning
The more food photos you take, the faster you will improve your food photography skills. If you want to improve rapidly, take a food photography class or workshop. Many professional food photographers offer in-person and online food photography workshops to help you learn how to use a high-end camera, understand lighting, and improve your storytelling through images.
Popular food photography duo Todd Porter and Diane Cu-Porter (aka, White on Rice Couple) frequently offer well-reviewed in-person and online food photography workshops. (Source: White on Rice Couple)
Frequently Asked Questions (FAQs)
Restaurant food photography is one of the more fun aspects of restaurant management, but there are some common questions you may have before diving in.
There is no better marketing for restaurants than showcasing excellent food photography. Food photography gives restaurant customers a chance to work up an appetite. Sharing food images online helps customers find your restaurant when they are craving a specific dish, and lets them know if their order has been prepared correctly when ordering delivery. Food images on your menu can also break down language barriers, which is incredibly helpful in diverse cities or tourist destinations. Food photography can also increase upselling opportunities.
The most challenging aspect of food photography is making food look appetizing in a still image. The second challenge is creating images that stand out from the crowded field of images online and on social media. With so many images of burgers on Instagram, how can you ensure yours will stand out? Hot foods and cold drinks also tend to wilt pretty fast.
So, you need to have the skills to capture a good image quickly before the foods lose their luster. The best way to overcome these challenges is simply to practice. The more food images you capture, the better your eye will be. Soon, you’ll be capturing expert food photos in seconds after a plate hits the table.
A food photography camera is the one you can afford. For many people, that camera is their smartphone. For most restaurant owners and managers, a top-of-the-line smartphone camera is the best food photography camera because it allows you to share food images instantaneously to social media or your restaurant website.
If you take a lot of food photographs, there are many excellent DSLR and mirrorless cameras at every price level. Lighting and a good eye are more important for capturing excellent food photos than your actual camera. If you are just starting out, getting a user-friendly camera you can afford will be better than spending thousands of dollars on an advanced camera that you don’t know how to use. You can always upgrade your camera later as you develop more skills.
Bottom Line
Photos of your restaurant’s food are the foundation for all of your restaurant marketing efforts, from social media posts to printed menus and your restaurant website. A basic understanding of lighting and angles along with a good smartphone camera is enough to get started taking food photographs for restaurants.
For big projects like printed menus and cookbooks, you’ll want to hire a professional photographer through a referral or a freelance photography website. If you work with a third-party online ordering site, you may even get professional food photography for free.